

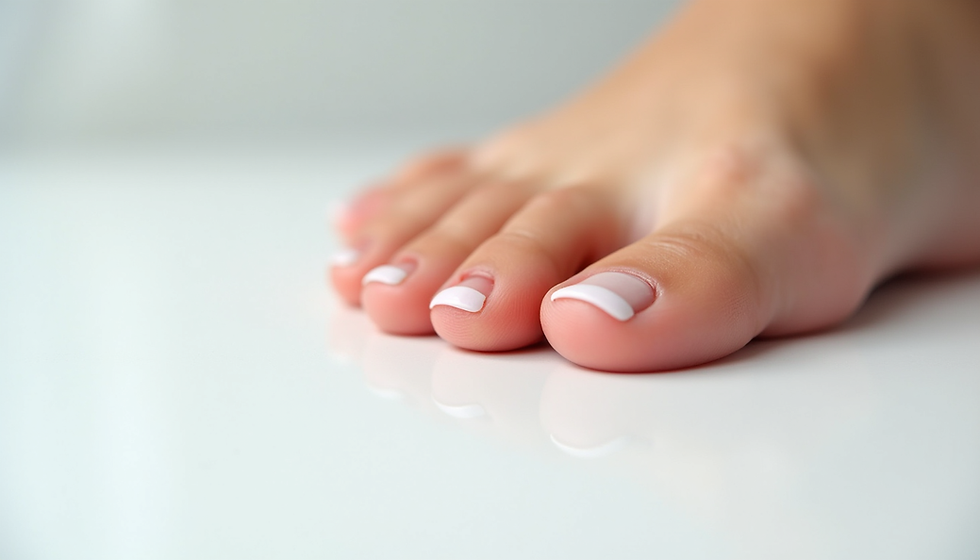
Easy Steps to Apply Press-On Toenails for a Perfect DIY Pedicure Nails Look
- Michelle Robinson, MBA, MMS, RMA

- 3 days ago
- 4 min read
If you’ve ever wanted to jazz up your toes without the hassle of a salon visit, you’re in the right place! Applying press-on toenails is a fantastic way to get a salon-worthy pedicure at home. Trust me, it’s easier than you think, and the results can be stunning. Plus, with clean, vegan, and cruelty-free options like DEMIblue, you can pamper your nails without compromising your health or values. Ready to dive into the world of DIY pedicure nails? Let’s get started!
Why DIY Pedicure Nails Are a Game-Changer
Doing your own pedicure nails at home is not just about saving money (though that’s a huge bonus!). It’s about control, creativity, and comfort. You get to pick the colors, the designs, and the timing that suits you best. No rushing, no awkward salon chairs, just you and your toes having a good time.
Here’s why I love DIY pedicure nails:
Flexibility: Apply them whenever you want, whether it’s a last-minute beach day or a special occasion.
Hygiene: You control the cleanliness of your tools and products.
Customization: Choose from endless styles, from subtle nudes to bold patterns.
Health-conscious: Use non-toxic, vegan products like DEMIblue that care for your nails and your body.
And the best part? You don’t need to be a pro to get it right. With a little patience and the right steps, your toes will look fabulous in no time.

Step-by-Step Guide to Applying Press-On Toenails
Let’s break down the process into easy, manageable steps. Follow along, and you’ll have a flawless pedicure in under 30 minutes!
Step 1: Prep Your Toenails
Preparation is key! Start by removing any old polish and washing your feet thoroughly. Dry them completely because moisture can prevent the press-ons from sticking properly.
Trim and file your natural nails to your desired shape.
Gently push back your cuticles with a cuticle stick.
Buff the surface of your nails lightly to remove shine. This helps the adhesive bond better.
Wipe your nails with rubbing alcohol or a nail cleanser to remove oils.
Step 2: Choose the Right Size
Press-on toenails come in various sizes. Take your time to find the perfect fit for each toe. If a nail is too big, it might lift or look unnatural. Too small, and it won’t cover your nail properly.
Pro tip: If you’re between sizes, go for the larger one and file it down gently.
Step 3: Apply the Adhesive
Most press-on toenails come with adhesive tabs or glue. I recommend using glue for a longer-lasting hold, especially on toenails.
Apply a thin layer of glue to your natural nail.
Apply a small amount of glue to the back of the press-on nail.
Wait about 10-15 seconds for the glue to become tacky.
Step 4: Press and Hold
Now, the fun part! Align the press-on nail with your cuticle and press down firmly for about 30 seconds. Make sure to hold the edges down to prevent lifting.
Repeat for each toe, and don’t rush. Precision beats speed here.
Step 5: Finishing Touches
Once all nails are applied, file the edges gently if needed to smooth out any rough spots. You can also apply a clear topcoat for extra shine and durability.
And voilà! You have a gorgeous DIY pedicure nails look that’s ready to show off.

What is the Best Fake Toenail to Cover Fungus?
Sometimes, toenail fungus can make you hesitant to show off your toes. The good news? There are fake toenails designed to cover imperfections like fungus while protecting your natural nails.
When choosing fake toenails for this purpose, look for:
Breathable materials: Nails that allow air circulation to prevent worsening fungus.
Non-toxic formulas: Avoid harsh chemicals that can irritate sensitive skin.
Durability: Nails that stay put without lifting, which can trap moisture.
Natural appearance: Choose colors and finishes that blend well with your skin tone.
Using clean, vegan products like DEMIblue’s press-on nails can be a gentle option. They are free from harmful toxins and cruelty-free, making them safe for sensitive nails and skin.
Remember, while fake nails can cover fungus, it’s essential to treat the underlying condition with proper medical care. The fake nails are a cosmetic solution, not a cure.
Tips for Maintaining Your Press-On Toenails
Getting your press-on toenails to last is all about care. Here are some tips to keep them looking fresh and fabulous:
Avoid soaking your feet in water for long periods, especially in the first 24 hours.
Wear open-toed shoes or sandals to reduce pressure on the nails.
Reapply glue if you notice any lifting.
Keep your feet clean and dry.
Remove the nails gently when you’re ready to take them off to avoid damaging your natural nails.
With these simple habits, your DIY pedicure nails can stay flawless for up to two weeks or more!
Why I Choose DEMIblue for My DIY Pedicure Nails
As someone who cares deeply about what goes on my body, I’m picky about nail products. DEMIblue nails check all the boxes for me:
Clean and vegan: No nasty chemicals or animal testing.
Cruelty-free: Ethical beauty that feels good inside and out.
Safe for sensitive nails: Perfect for breast cancer survivors and health-conscious women.
Beautiful colors: From soft pastels to vibrant hues, there’s something for every mood.
Using DEMIblue’s press-on toenails means I can enjoy stunning nails without worrying about toxins or ethical concerns. Plus, the application is a breeze, making my DIY pedicure nails experience both fun and guilt-free.
Ready to give your toes a fresh new look? Grab your favorite set of press on toenails and follow these easy steps. You’ll be amazed at how simple and satisfying it is to create a salon-quality pedicure right at home. Happy pampering!


Comments